Google Tag Manager Support
Note: This feature references the previous name for the service, "Metomic" in some places.
1. Ensure the confirmic embed script is installed
There are two ways to install the Confirmic embed script. Directly into the head of your webpage or by using GTM.
Confirmic will load and display faster if you install it directly into the head of your webpage, as described in the section Installing the Consent Manager.
This will not affect Confirmic's ability to interact with GTM. If you choose this method please jump to Step 2.
A) Create a tag
In your GTM project, create a new tag by clicking New → Custom HTML Tag
In the HTML field, enter your Confirmic embed snippet:
<script src="https://config.confirmic.com/config.js?id=__YOUR_CLIENT_ID__" crossorigin charset="utf-8"></script>
<script src="https://consent-manager.confirmic.com/embed.js" crossorigin charset="utf-8">
To help identify the tag later, ensure you provide a name at the top of the page (e.g. "Confirmic Embed Code")
Be sure to replace YOUR_CLIENT_ID with your real clientId!
You can find this in the Developers section of the dashboard. Better yet: You can find your full embed snippet in the Developers section of the dashboard.
B) Enable the tag on all pages
Under Triggering, choose All Pages as the trigger.
C) Save your changes
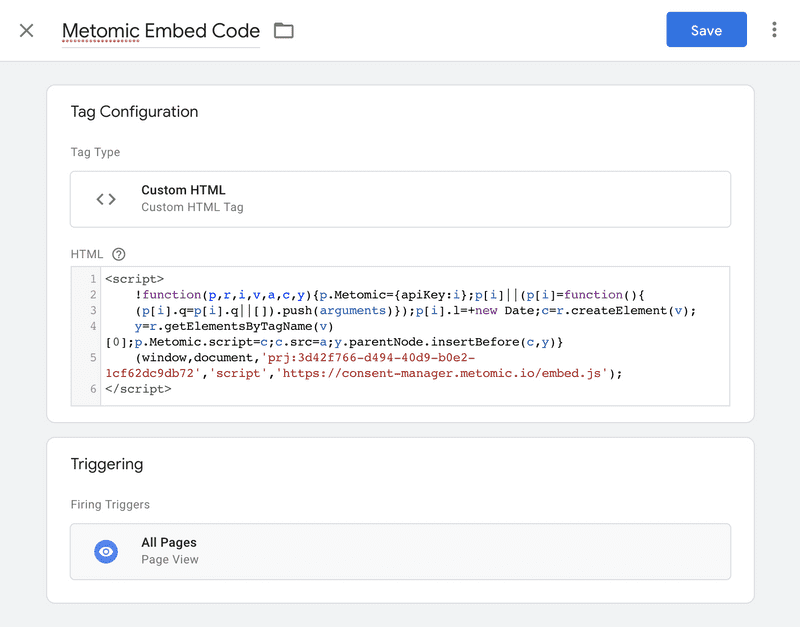
Your configuration is now ready to save, and should look something like this:

D) Publish your changes
Once you've saved the tag, ensure you click Submit → Publish to push the change live to your site.
2. Set up Confirmic variable and triggers
In order to block a problematic tag from running until consent is given, you will need to modify that tag's configuration. This will usually involve changing the trigger from "All Pages" to "Confirmic:Permit [your-policy]"
To facilitate this, we must create:
- A GTM variable which contains a micropolicy slug
- GTM triggers which represent your micropolicies
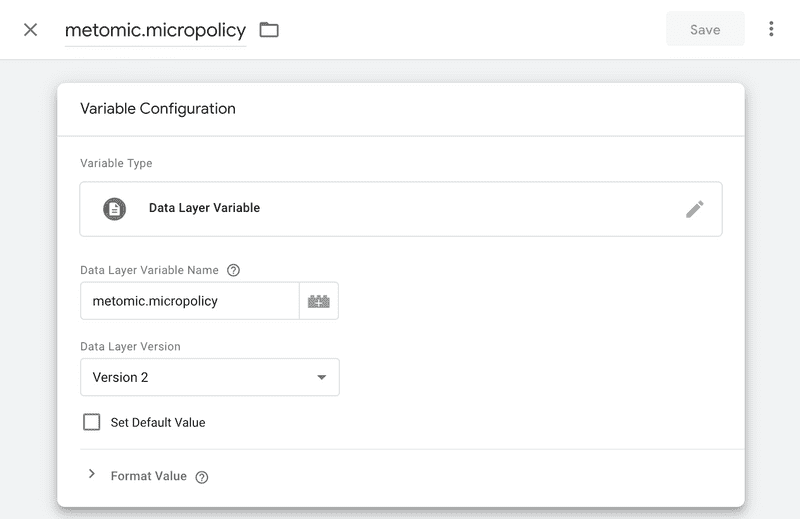
A) Set up the metomic.micropolicy variable
- Click Variables → User-Defined Variables → New
- Create a new Data Layer Variable.
- Set the Data Layer Variable Name to be
metomic.micropolicy - Set the Name of the variable at the top of the screen to
metomic.micropolicy

B) Set up triggers for your micropolicies
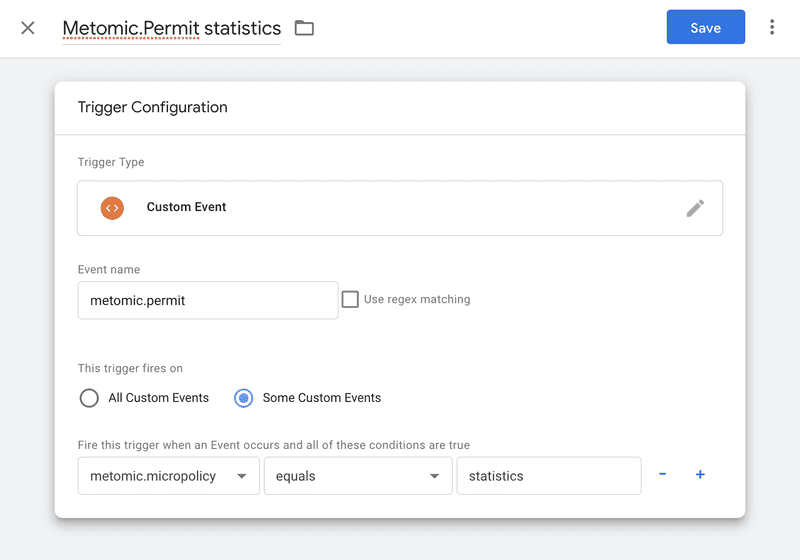
In order to trigger a tag when consent has been granted for a particular micropolicy, you must create a trigger for that policy. For this example, we will create a trigger for the statistics policy:
- Click Triggers → New → Custom Event
- Set the Event Name to
metomic.permit - Under "This trigger fires on", select Some Custom Events
- Set a condition of
metomic.micropolicyequalsstatistics

In manual integration mode, you will need to repeat this step for your other micropolicies.
3. Allocate a trigger to each tag you wish to control
Now that you have triggers set up, you can configure a target tag to only load when the trigger fires.
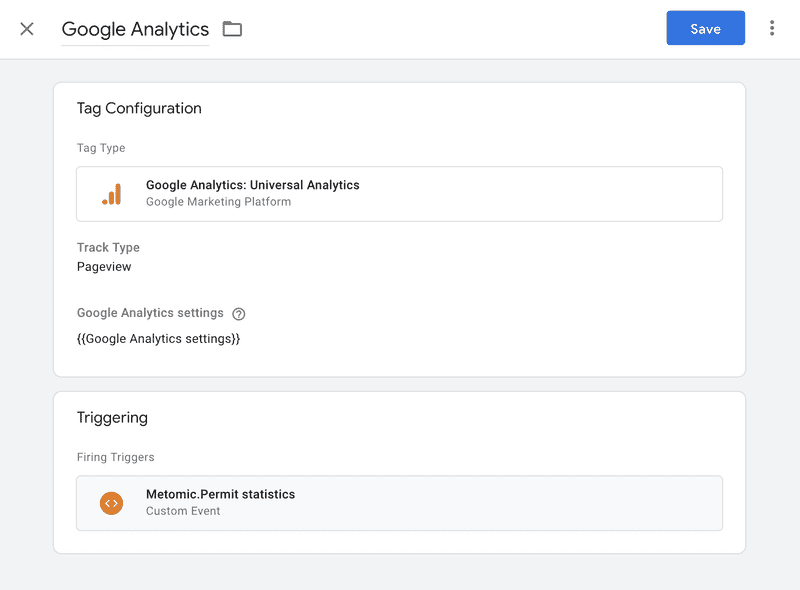
Under Tags, choose a tag you wish to control. In this example, we'll configure Google Analytics to only run once permission for statistics has been given.
Under Triggering, add the appropriate trigger as set up in step 2. In this case, we'll choose "Metomic.Permit statistics"

Note: If there is already a "Page View" trigger present for your tag, you will need to replace it with the appropriate Metomic.Permit trigger
Finally, click Publish to push your changes live to your site
Updated over 4 years ago