Autoblocking
What is Autoblocking?
Autoblocking is a feature that blocks scripts automatically - without the need for code changes.
As you can imagine, manual blocking can get very tedious if you have many scripts that could potentially send and set cookies.
This becomes even more annoying for external scripts since it's not immediately obvious which of those set cookies. You would have to go into the developer tools and check the set-cookie response header for every request to know if additional cookies were set from a given request. Even then, there's no guarantee that just because an external request does not set cookies now, that it won't in the future.
This is where automatic script blocking comes in.
Did you know?
Browsers are starting to default the
set-cookieheader toSameSite=Laxfor requests that omit them. This means that the browser will no longer automatically send third-party cookies to the external site that set them by default.This is a win for users' privacy since it reduces the ability for websites to track individuals across the Web. However, if the cookie was set with
SameSite=NoneandSecure, the cookie will still be sent to the external site when the (HTTPS) request is made - which means that the most fool-proof way of protecting your users' privacy is to not make the request at all.
How do I use it?
When autoblocking is enabled, Confirmic will remember which third parties require consent (and which don't) - and only allow content and scripts from those third parties when consent has been given.
You can control which third parties are automatically blocked on the "Autoblocking" page of your Confirmic Dashboard.
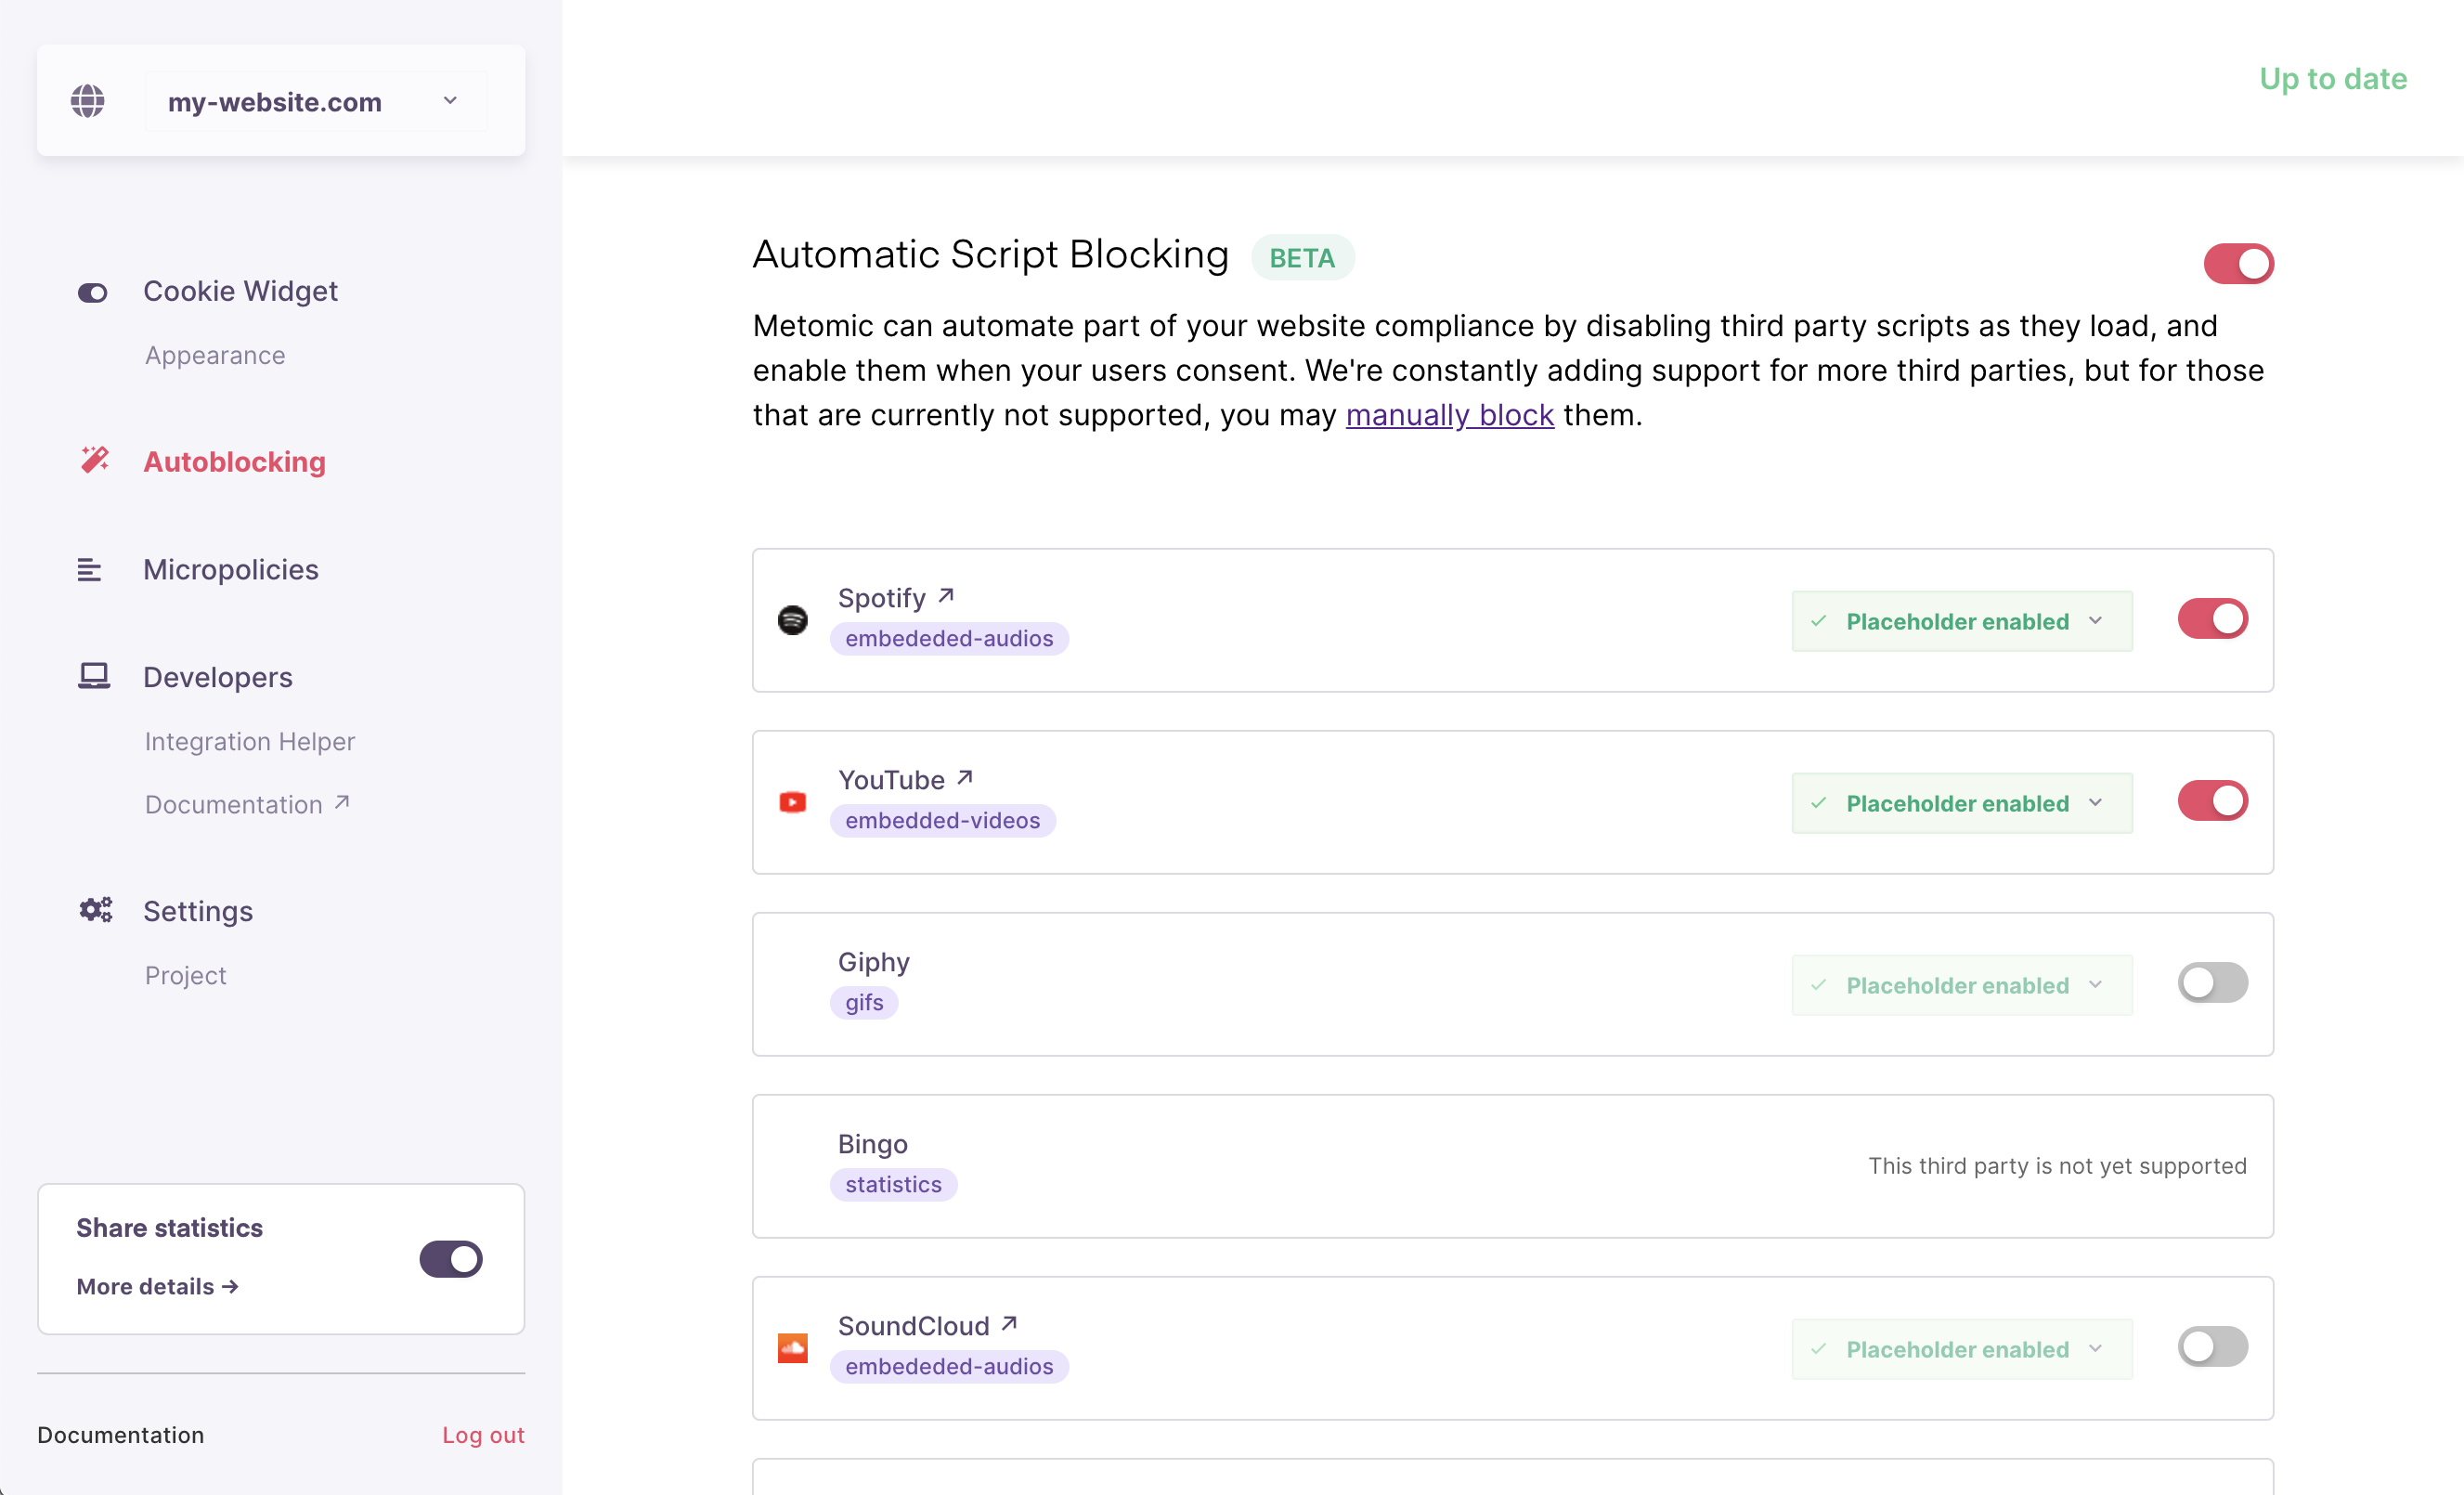
In this example, Spotify and Youtube are prevented from running in the page until consent has been given
How does it work?
- The first line in your embed snippet (see "Installing the Consent Manager") informs Confirmic about the possible scripts on your site that set cookies.
Confirmic uses that list of rules to find and block any potentially offending HTML elements.
<!-- The confirmic embed snippet: -->
<script src="https://config.confirmic.com/config.js?id=__YOUR_CLIENT_ID__" crossorigin charset="utf-8"></script>
<script src="https://consent-manager.confirmic.com/embed.js" crossorigin charset="utf-8"></script>
- The second line of the embed snippet downloads the Confirmic client-side library, which includes the logic that kicks off the Autoblocking functionality.
What happens under the hood?
To make this work, Confirmic spins up a MutationObserver, watching your page for any elements that match the Autoblocking rules that you have enabled.
This is why it's important to keep the Confirmic snippet at the top of your
<head>- so that it catches as problematic elements before they have a chance to take effect
How do I add a new third party to the list?
The "Third Parties" list will show you all of the third parties contained in any of your micropolicies
To add a new third party to the autoblocking set:
- Create (or navigate to) a Micropolicy in the dashboard.
- Navigate to the "Third Parties" tab of the Micropolicy screen (see screenshot below). You may also click the purple pill under each third party, which will take you to the "Third Parties" tab of that Micropolicy.
- Add a third party to the table. It will also then appear in the master "Third Parties" list.
- Make sure that the third party that you have added has autoblocking turned on.
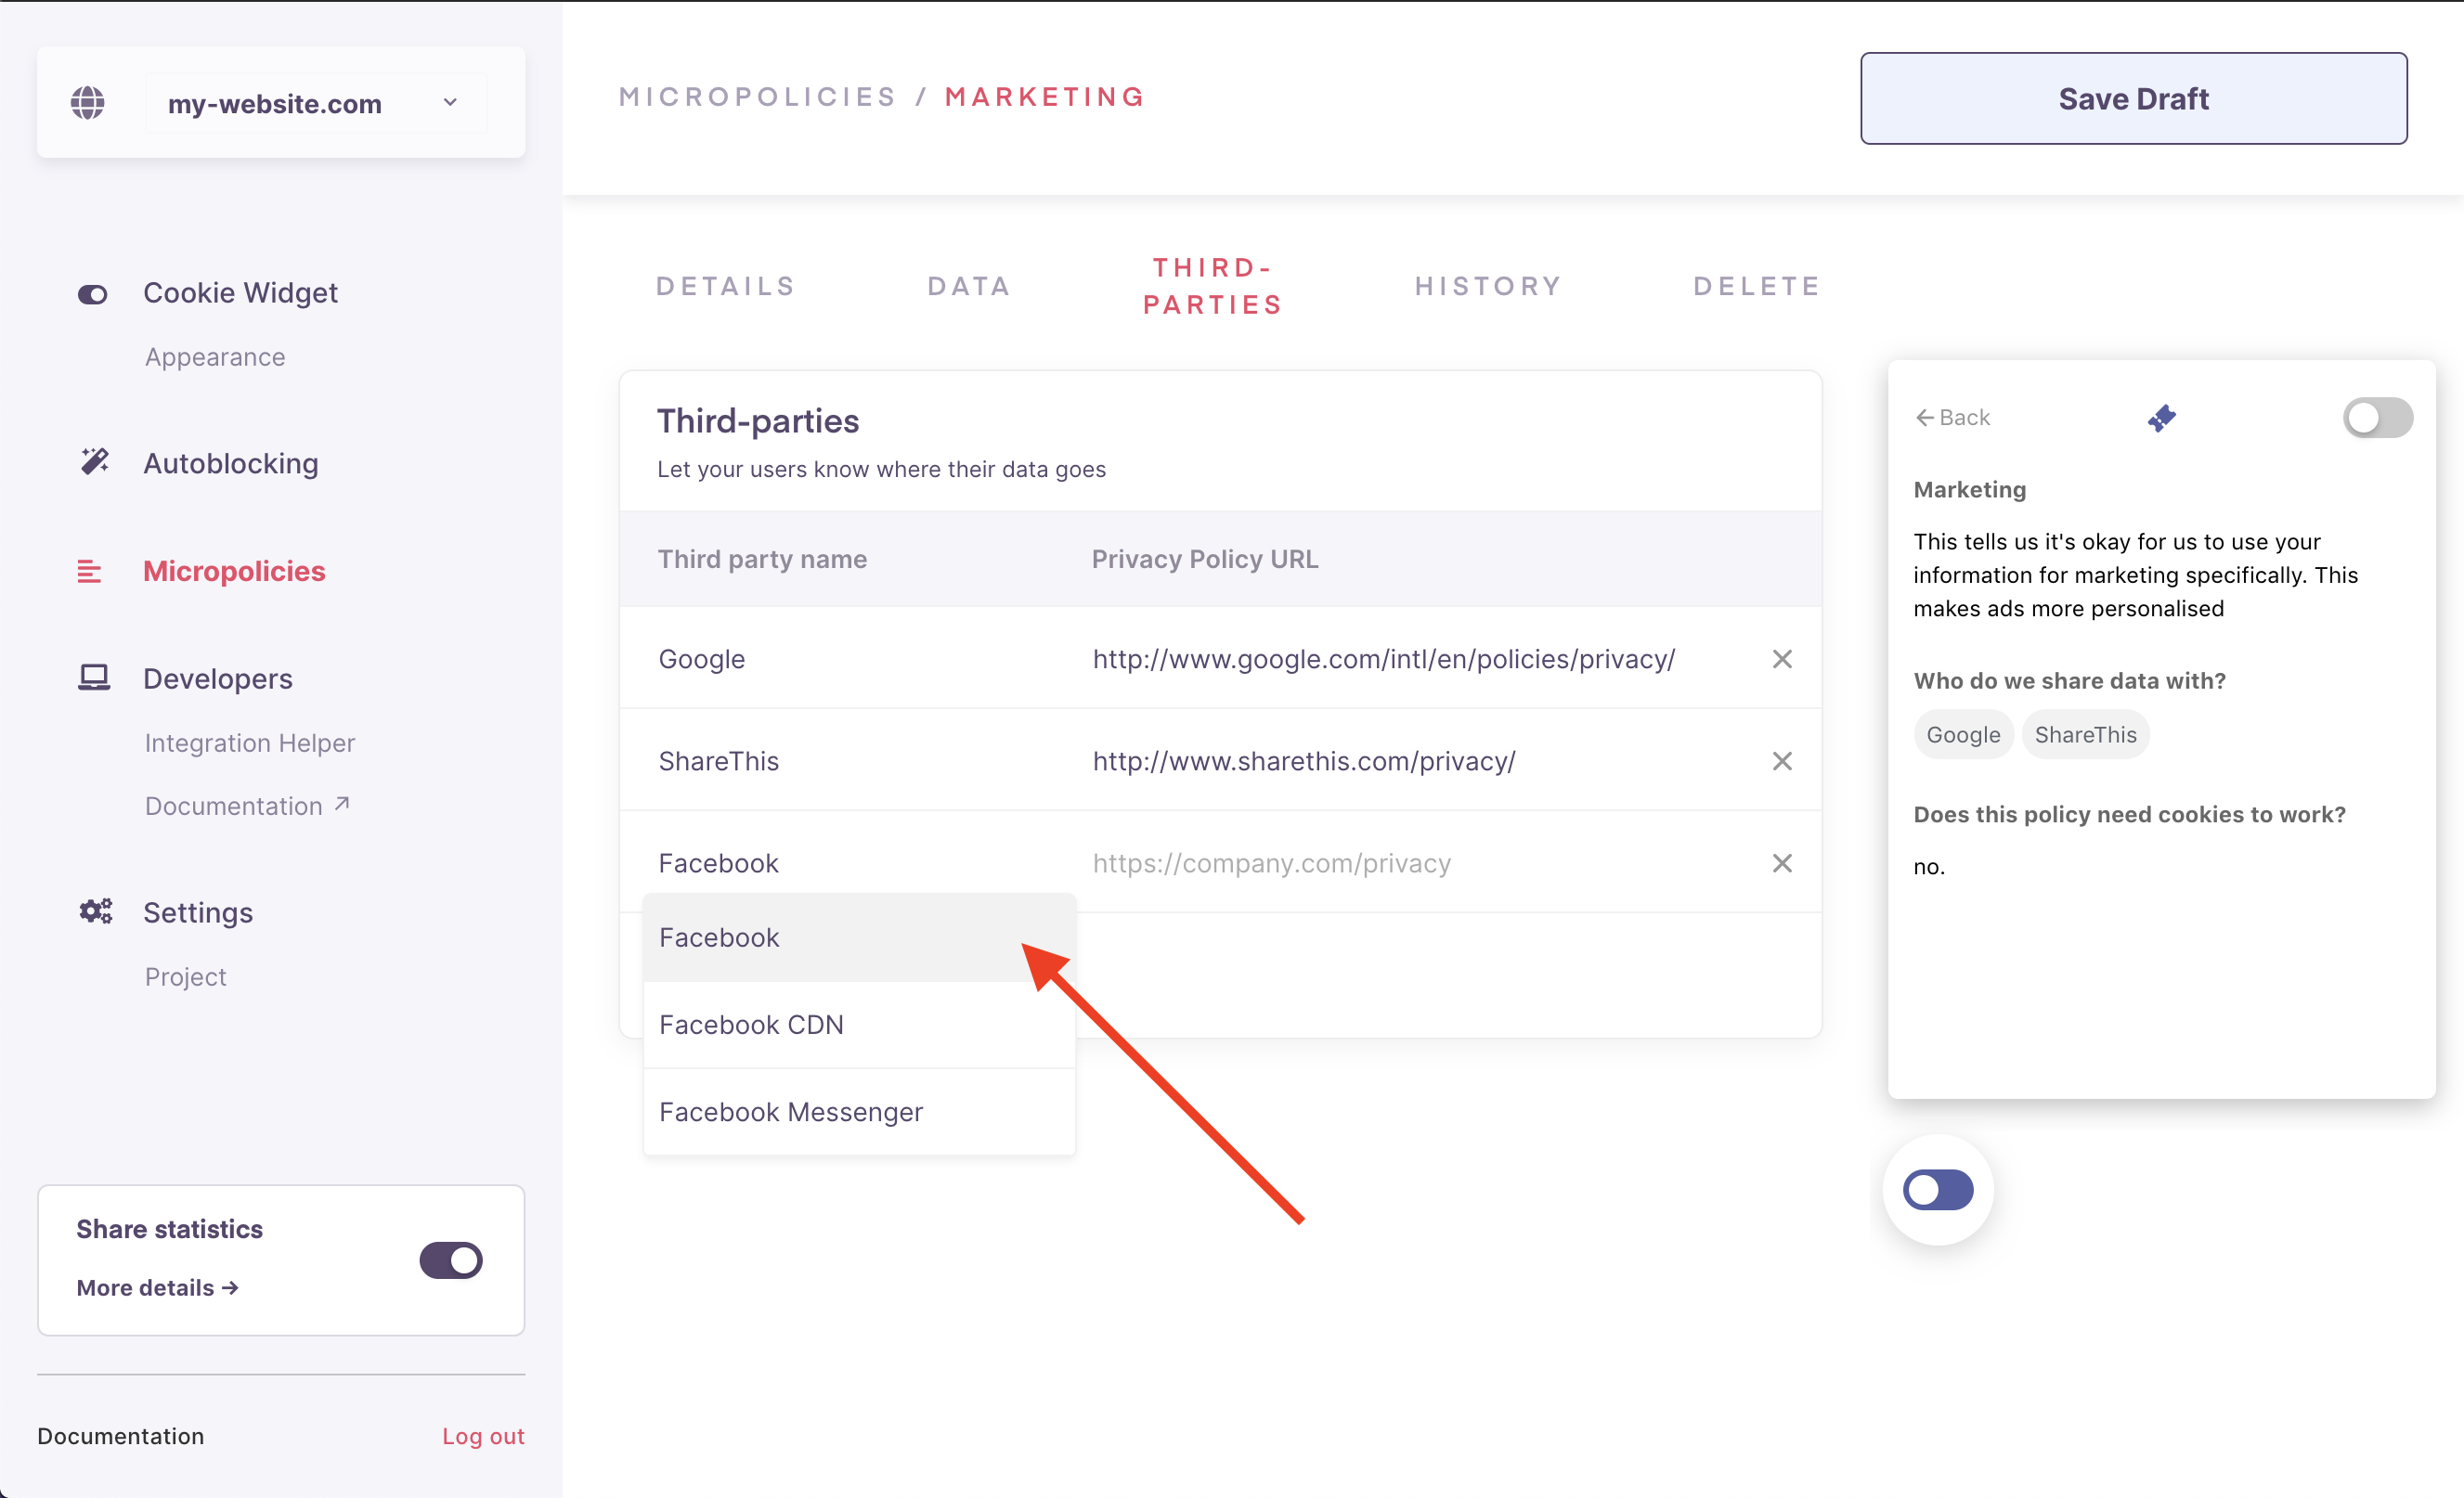
Step 2: Add a new third party to a micropolicy.
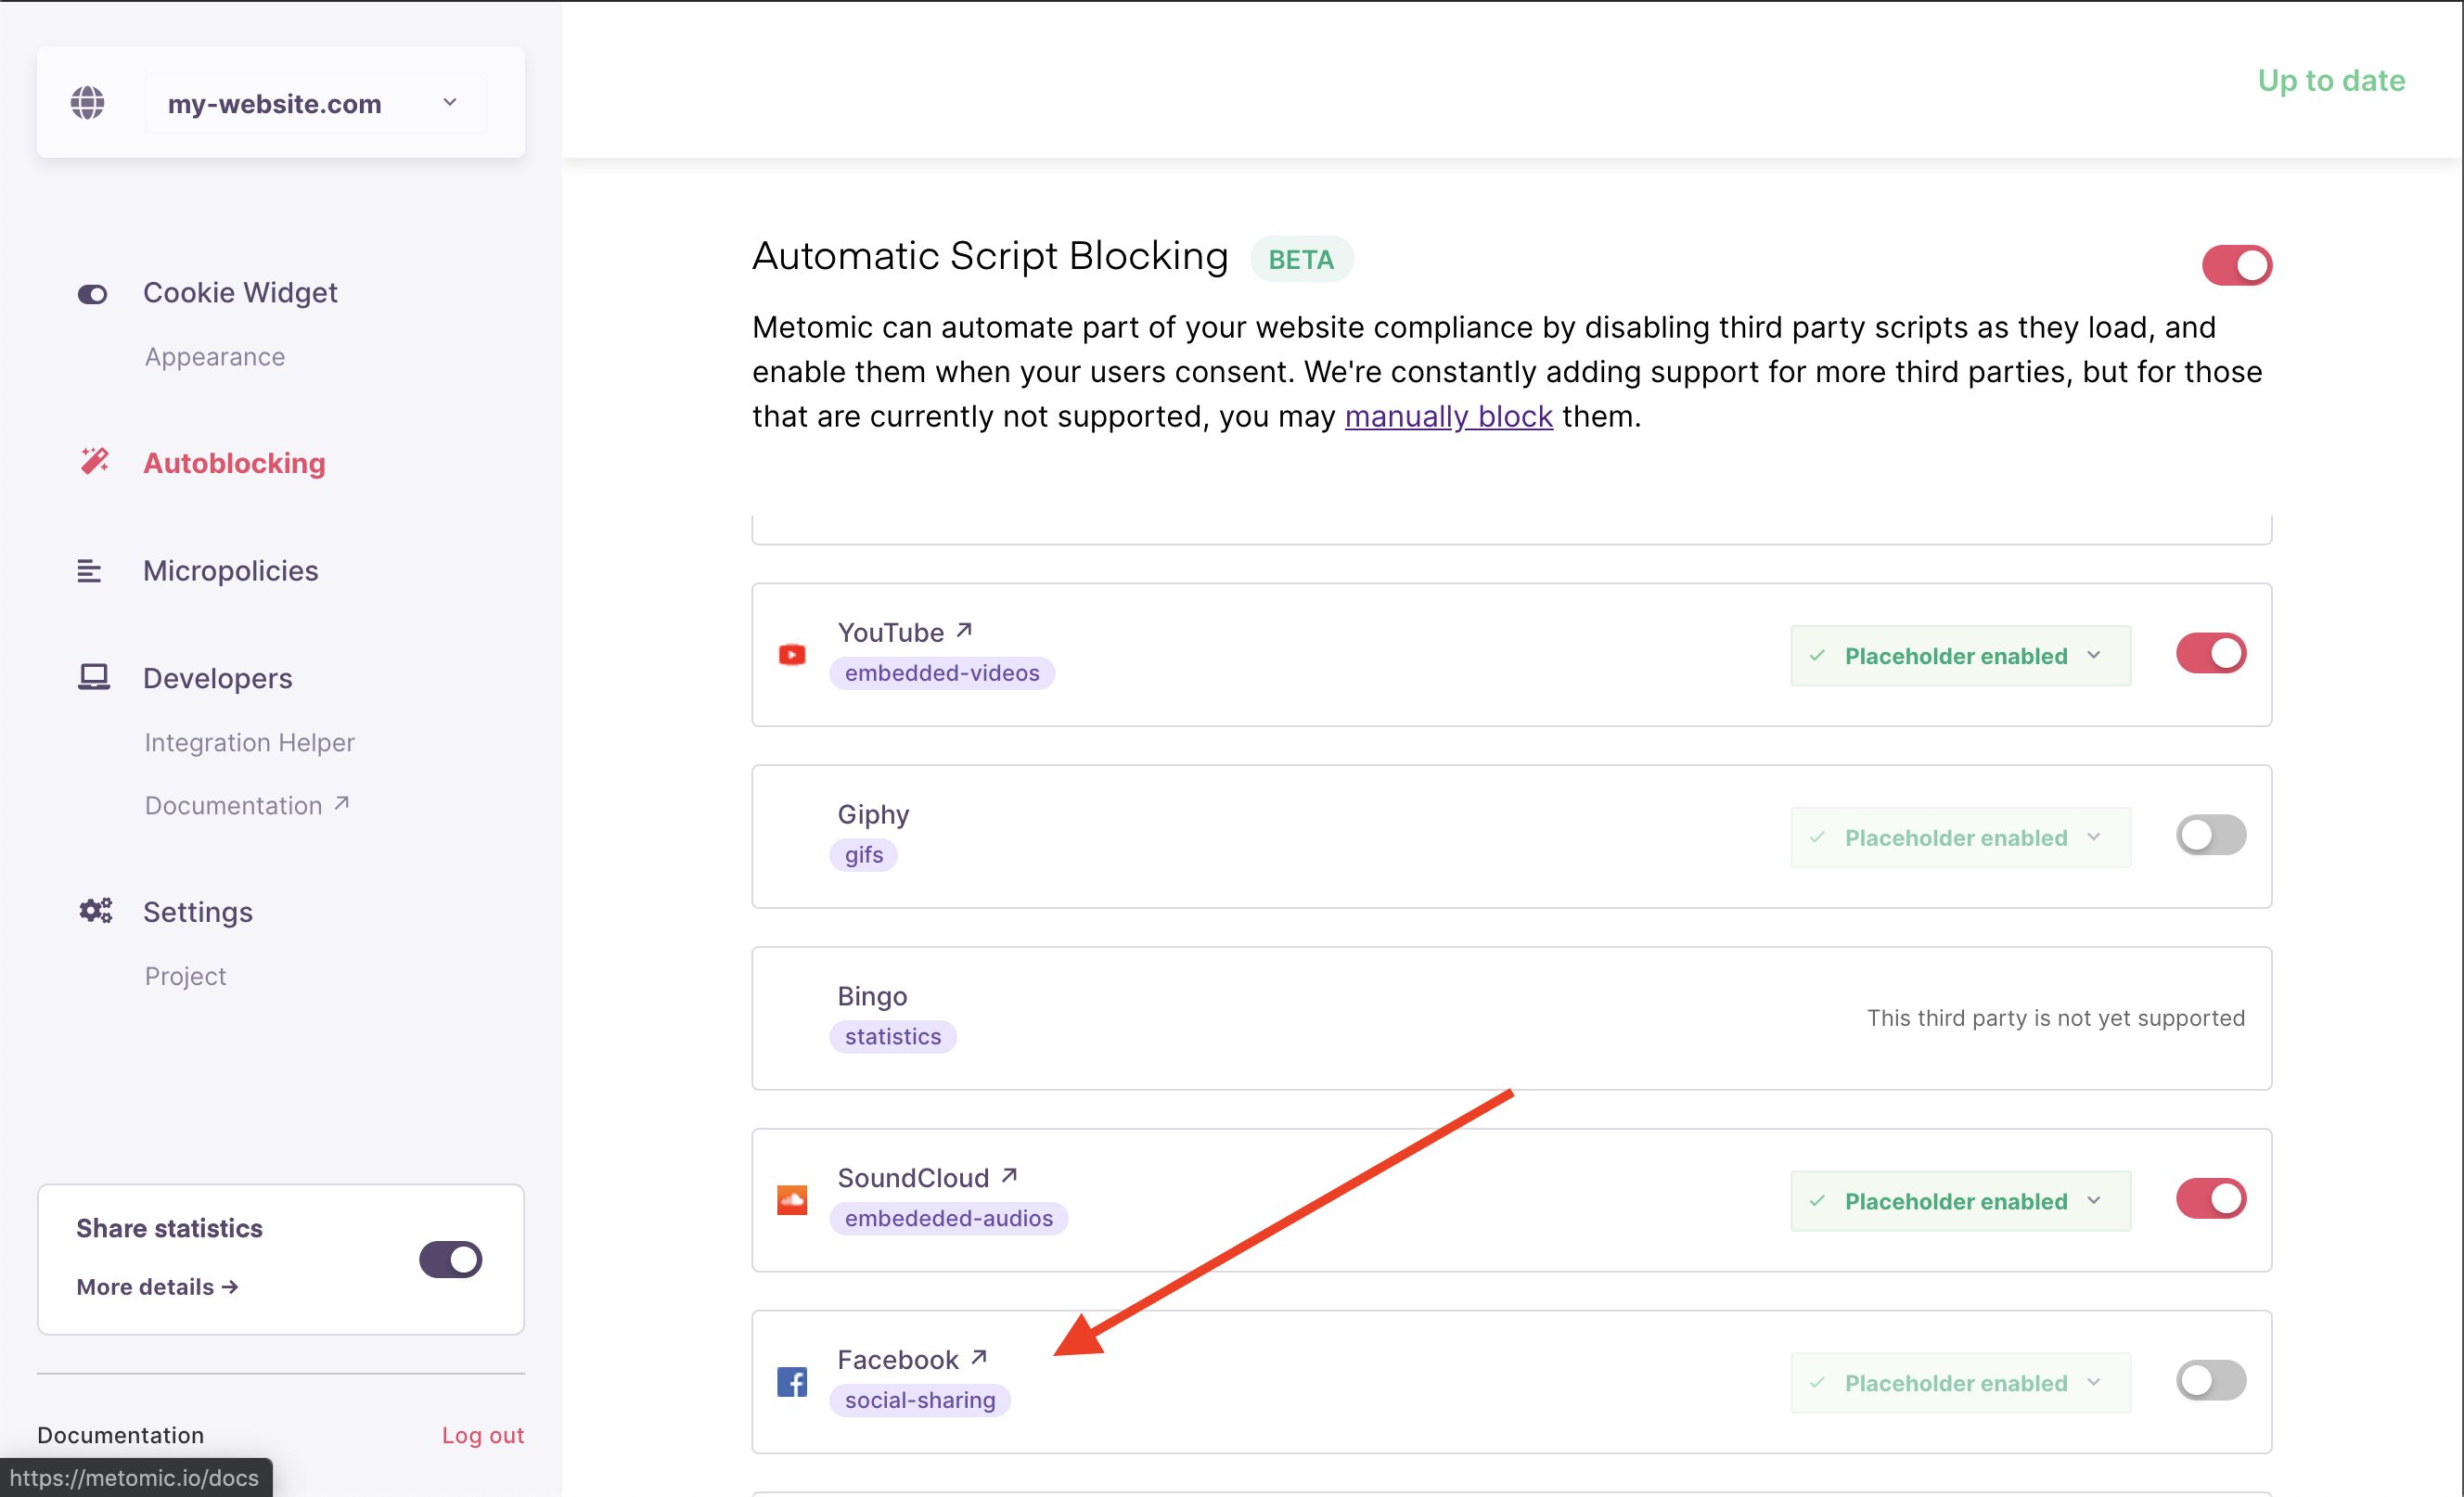
Step 2: The newly added third party is available in the "Automatic Script Blocking" page.
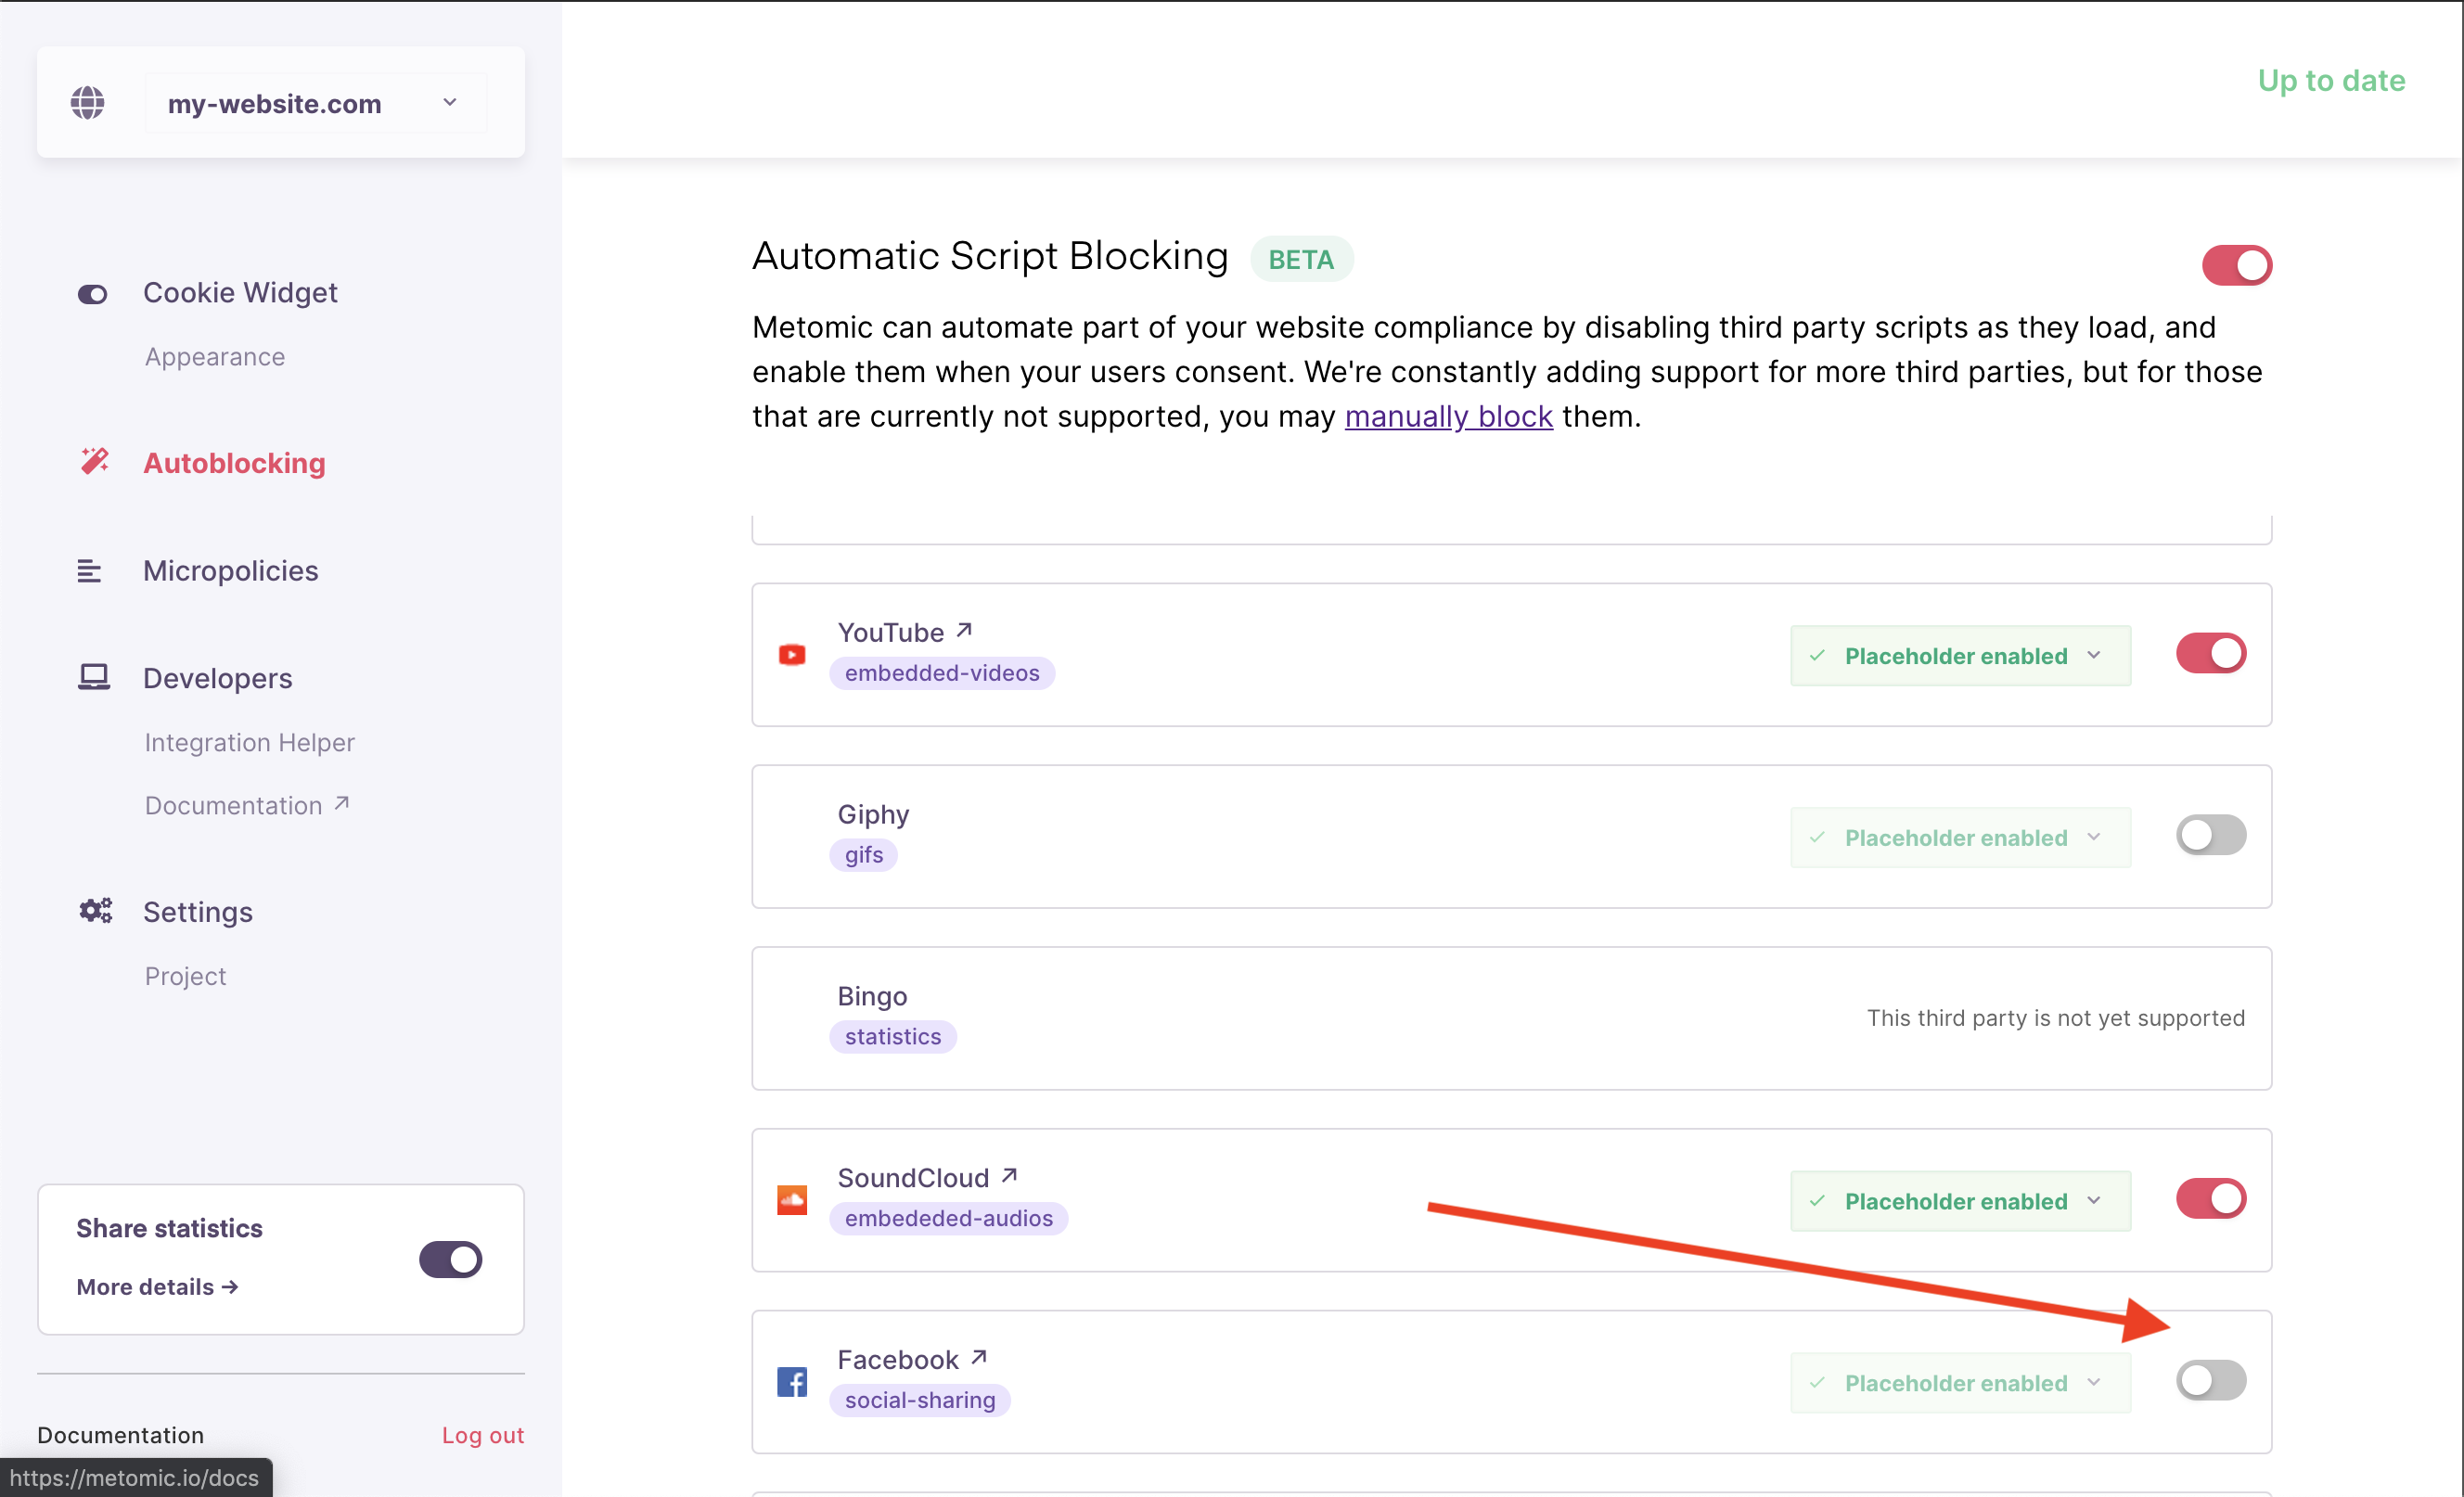
Step 3: Ensure that the autoblocking setting for that specific third party is enabled.
Bonus step: Some third parties can be autoblocked and have a placeholder rendered in their place. This is particularly useful for interactive components such as videos or buttons. Find out more about placeholders in the Contextual Consent section of the guides.
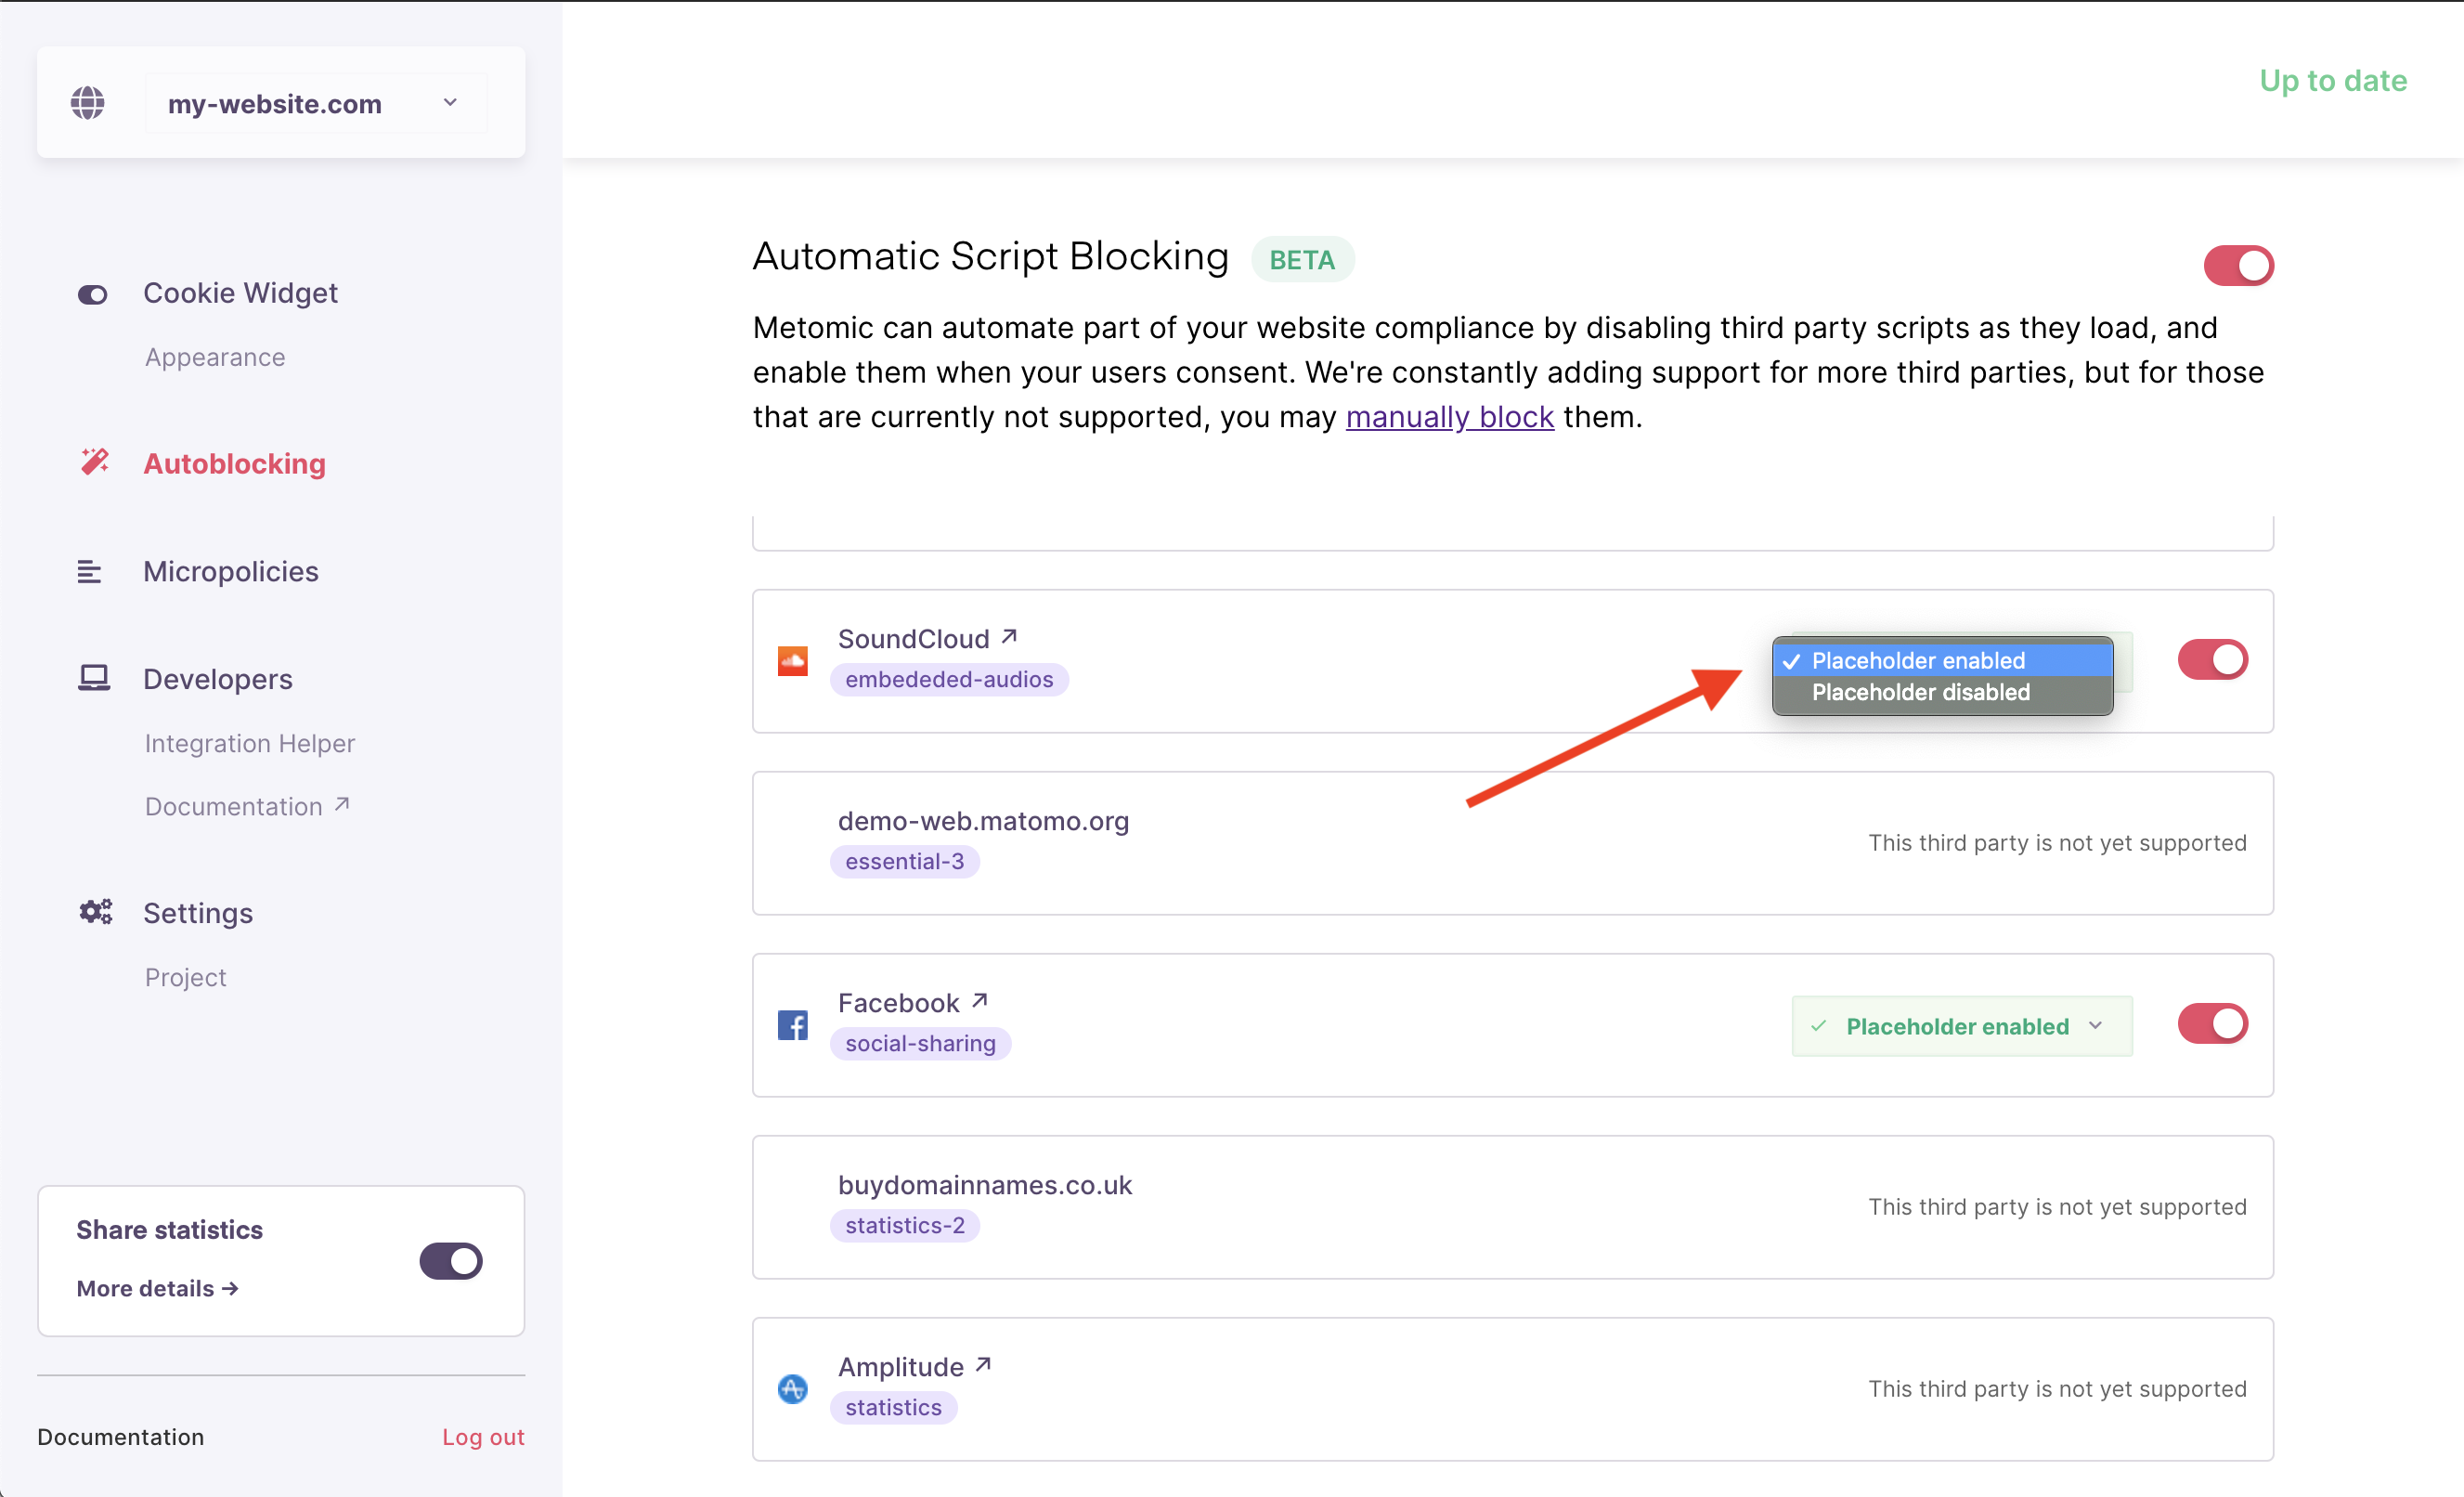
Optionally enable a Placeholder for a third party that supports it.
What if something cannot be automatically blocked?
We're constantly adding support for more third parties, but for anything that Autoblocking cannot catch, you can still block the element manually.
Updated almost 6 years ago